In an earlier post, I mentioned an interest in “exposure bracketing”, but I didn’t say why. Simply put, it’s the first step in High Dynamic Range Photography (HDR). The linked article explains it more thoroughly than I can, but I thought it would be fun to tell about my experience with the technique.
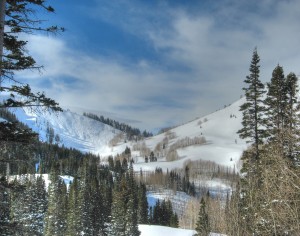
It turns out that a ski trip is an ideal time to try it out. Snow photography is tricky at best, in part because of the wide difference between the very bright snow (especially when sunlit) and shadows in, for instance, trees. A compromise has to made when making the exposure as to where the detail is most clear — somewhere between the bright and the shadows.
HDR can help. Briefly put, several exposures of the same scene are captured (ideally with the camera stabilized on a tripod), each at a different exposure. In the photos you’ll see on this page, three shots were made of each scene — each 2 stops different than the others (-2, normal, +2). The CHDK (mentioned in the earlier post) helps automate the exposure process, but then what?
A post process is needed where the shots are blended, averaged or mapped together to create the composite exposure. I used PhotoMatix (about $130 on their site), and got the results you see here. Very easy to use.
I spent some time on the ski trails, and on two separate days captured a variety of scenes in conditions of both overcast with snow and bright sunlight. In the 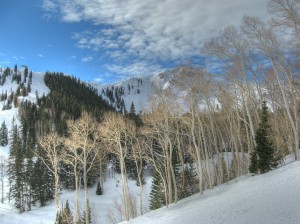 gallery site here, there are several pairs of photos. The first is an automatic exposure that represents the best effort of the camera. The second version is a “tone-mapped” composite.